Wet Vent Plumbing: Understanding the Basics
Did you know that wet vent plumbing has been a part of the plumbing code since 1920? It’s a fascinating technique that allows one pipe to serve as both a waste pipe and a vent, protecting the drain’s trap and connecting multiple fixtures to one system. If you’re curious to learn more about wet venting, its definition, how it differs from dry venting, and the code requirements involved, keep reading!
Key Takeaways:
- Wet vent plumbing has been in the plumbing code since 1920.
- A wet vent is a pipe that serves as both a waste pipe and a vent, protecting the drain’s trap.
- Wet venting is different from dry venting, which only transports air.
- It is commonly used for bathroom fixtures and requires specific rules and codes.
- Proper installation and pipe size are crucial to avoid clogging and hydraulic overload.
What is a Wet Vent?
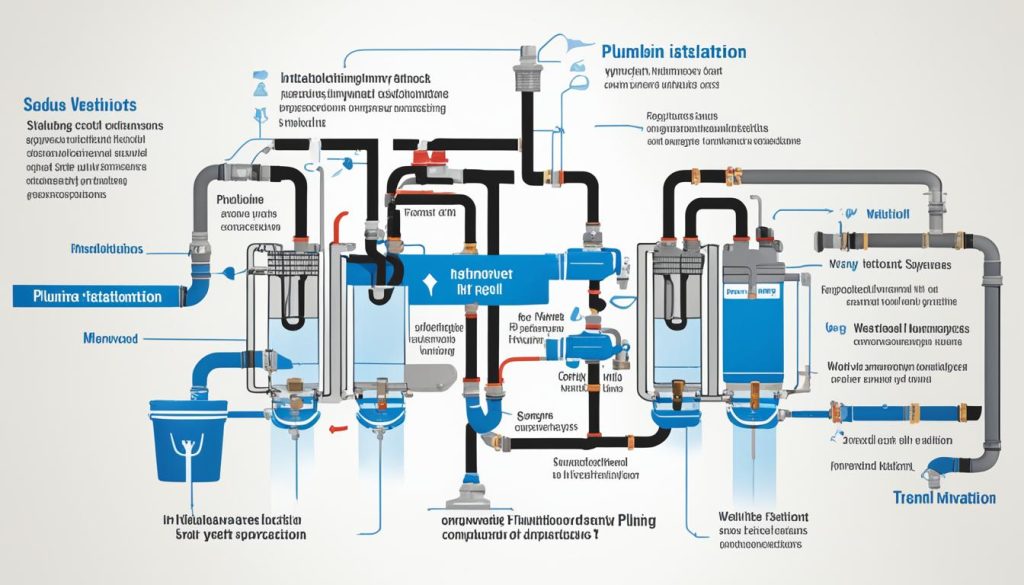
A wet vent is a type of plumbing pipe that serves a dual purpose—it functions both as a waste pipe and a vent. This unique system allows multiple fixtures, such as toilets, sinks, showers, and lavatories, to connect to a single pipe system. The primary role of a wet vent is to protect the drain’s trap and prevent the loss of trap seals. Additionally, it helps balance the air pressure inside the drainage system, ensuring efficient waste removal.
Unlike dry venting, which is solely responsible for transporting air, wet venting combines the functionality of a waste pipe and a vent. This means that wastewater and air are carried through the same pipe. Wet venting provides a practical and space-saving solution, especially in areas where multiple fixtures share proximity or are located in close proximity.
Wet venting is commonly used in bathroom plumbing systems but can also be utilized in other applications where efficient waste removal is required. To ensure proper installation and functionality, it is crucial to follow the codes and guidelines specified for wet vent systems. Adhering to these regulations helps prevent issues such as clogging and hydraulic overload.
Benefits of Wet Venting
There are several advantages to implementing a wet venting system in plumbing:
- Efficient drainage: Wet venting allows for multiple fixtures to be connected to one vent, reducing the need for additional pipes and fittings.
- Cost and material savings: By eliminating the need for separate vent pipes, wet venting can save both time and money during installation, as well as reduce the use of materials.
- Trap seal protection: Wet venting ensures that trap seals are maintained, preventing the escape of foul odors and the entry of sewer gases into living spaces.
- Air pressure balance: The inclusion of a wet vent helps balance the air pressure within the drainage system, preventing negative pressure and potential loss of trap seals.
- Noise reduction: Wet venting effectively transports wastewater, minimizing drainage noise and creating a quieter and more comfortable environment.
Wet Venting vs Dry Venting: What’s the Difference?
While wet venting combines waste and vent functions in a single pipe, dry venting serves the sole purpose of providing airflow to a plumbing system. Dry venting is typically used to vent air from a single fixture at a time, ensuring that proper pressure is maintained within the system.
Wet venting offers the advantage of combining both venting and waste removal functions, allowing for more efficient and streamlined plumbing installations.
Wet Venting vs Dry Venting: What’s the Difference?
When it comes to venting in plumbing, there are two primary methods: wet venting and dry venting. While they may sound similar, there are distinct differences between the two.
Wet venting involves using a single pipe that serves both as a waste pipe and a vent. This means that multiple fixtures, such as toilets, sinks, showers, and lavatories, can be connected to one system. The wet vent pipe carries both wastewater and air, ensuring proper drainage and venting. This method is commonly used in bathrooms where several fixtures are grouped together.
Dry venting, on the other hand, is used to vent air from a single fixture at a time. It does not carry water and only transports air. Unlike wet venting, which allows multiple fixtures to be connected to one vent pipe, dry venting requires each fixture to have its own vent pipe.
So, what are the benefits of wet venting over dry venting? The primary advantage is that wet venting can save time, money, and materials, especially when adding new fixtures to a bathroom. With wet venting, you can connect multiple fixtures to a single vent pipe, eliminating the need for additional pipes and fittings. This can simplify the installation process and reduce costs.
Furthermore, wet venting can help maintain proper air pressure inside the drainage system, preventing negative pressure and trap seal loss. It can also reduce drain noise and effectively transport sewer gas outside of the home, creating a more pleasant and functional plumbing system.
To better understand the differences between wet venting and dry venting, here’s a side-by-side comparison:
| Wet Venting | Dry Venting |
|---|---|
| Allows multiple fixtures to be connected to one vent pipe | Requires each fixture to have its own vent pipe |
| Carries both wastewater and air | Transports only air |
| Commonly used in bathrooms | Used for individual fixtures |
| Can save time, money, and materials | Requires additional pipes and fittings |
As with any plumbing system, it is essential to follow the codes and guidelines for wet venting to ensure proper installation and functionality. Consulting with a professional plumber is recommended to ensure compliance with local plumbing codes and to address any specific requirements for your area.
Wet Venting: Installation Guidelines and Code Requirements
When installing a wet venting system, it is crucial to adhere to specific guidelines and code requirements to ensure proper functionality and compliance with local regulations. Here are some essential considerations:
1. Wet Vented Fixtures Location
All fixtures connected to the wet venting system should be located on the same floor. This requirement ensures efficient drainage and prevents potential issues with water flow and air pressure imbalances.
2. Toilet Placement
When using the same vent for different fixtures, it is important to position the toilet lower than the other fixtures. This arrangement helps maintain proper trap seal integrity and prevents unwanted backflow or drainage problems.
3. Horizontal Pipe Support
If horizontal plastic pipes are used in the wet venting system, it is recommended to install pipe supporters every 4 feet. These supports help prevent sagging and ensure proper slope for efficient waste flow.
4. Wet Vent Size Requirements
Local plumbing codes specify minimum size requirements for wet vents based on the number of fixtures connected to the system. It is crucial to comply with these requirements to prevent issues such as clogging and hydraulic overload.
5. Angle of Wet Vent Entry
When connecting wet vents to the drain line, it is important to ensure a minimum 45-degree angle of entry. This angle promotes smooth waste flow and minimizes the risk of obstructions or blockages.
By following these installation guidelines and code requirements, you can ensure the proper functioning and longevity of your wet venting system, minimizing common mistakes and maximizing its performance.
Here is a helpful visual representation of wet venting installation guidelines:
| Guideline | Description |
|---|---|
| Fixtures Location | All fixtures must be on the same floor |
| Toilet Placement | Toilets should be lower than other fixtures on the same wet vent |
| Horizontal Pipe Support | Install pipe supporters every 4 feet on horizontal plastic pipes |
| Wet Vent Size Requirements | Comply with minimum size requirements specified by local plumbing codes |
| Angle of Wet Vent Entry | Wet vents should enter the drain line at a minimum 45-degree angle |
Benefits of Wet Venting
When it comes to plumbing systems, wet venting offers several benefits that can improve efficiency and functionality. Let’s explore the advantages of wet venting:
- Efficient Drainage: One of the main benefits of wet venting is the ability to efficiently drain multiple fixtures using just one vent. This eliminates the need for additional pipe and fittings, saving both time and money in the installation process.
- Cost and Material Savings: Wet venting can be a cost-effective solution when adding new fixtures to a bathroom. By utilizing a single vent, you can avoid the need for extra materials and reduce the overall cost of the project.
- Pressure Balancing: Wet venting helps to balance the air pressure inside the drainage system. This is important because negative pressure can lead to trap seal loss, causing unpleasant odors and potential contamination. With wet venting, you can prevent these issues and maintain a healthy plumbing system.
- Noise Reduction: Another benefit of wet venting is its ability to reduce drain noise. By utilizing a larger pipe for multiple fixtures, you can minimize the noise generated during drain flow, resulting in a quieter and more comfortable bathroom environment.
- Sewer Gas Transport: Wet venting effectively transports sewer gas outside of the home, ensuring that it does not linger and cause unpleasant odors indoors. This can greatly improve indoor air quality and the overall comfort of your living space.
To illustrate the benefits of wet venting, here is a visually engaging table showcasing the advantages compared to traditional methods:
| Wet Venting | Traditional Plumbing | |
|---|---|---|
| Efficient Drainage | ✅ | ❌ |
| Cost and Material Savings | ✅ | ❌ |
| Pressure Balancing | ✅ | ❌ |
| Noise Reduction | ✅ | ❌ |
| Sewer Gas Transport | ✅ | ❌ |
As you can see, wet venting offers numerous advantages over traditional plumbing methods. Whether you’re a homeowner or a professional plumber, considering wet venting for your next project can lead to a more efficient, cost-effective, and reliable plumbing system.
Wet Venting Tips and Best Practices
When installing a wet venting system, it is crucial to follow certain tips and best practices to ensure optimal performance. Using the appropriate fittings permitted by local plumbing codes is essential for a successful installation. Understanding the distance from the trap arm to the vent pipe will help you purchase the correct materials and ensure a proper fit.
Another important aspect is using the correct trap arm size for different fixtures. This will ensure proper flow and prevent any complications. Additionally, it is important to be aware of the maximum run length for the trap arm to maintain effective drainage.
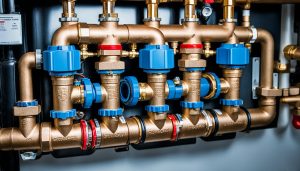
Before installation, thoroughly check copper tubes and fittings for any flaws or damage. This will prevent potential leaks and ensure the longevity of your wet venting system. It is also crucial to wear protective gear, such as gloves and goggles, when soldering pipes to protect yourself from any harm.
Finally, make sure to properly size the wet vent pipe according to local plumbing codes. This will prevent issues like clogging and hydraulic overload, ensuring smooth operation of your wet venting system. By following these best practices, you can minimize complications and achieve a successful and efficient wet venting installation.
- Investing Wisely: How Windows & Doors in Boost Property Value and Financial Health - April 24, 2025
- The Financial Impact of Personal Injuries: Why Legal Help Matters for Business Owners - April 16, 2025
- The Hidden Financial Costs of Domestic Assault: What Business Owners Need to Know - April 16, 2025


