Add Plumbing to Your Shed – Simple DIY Guide
Did you know that adding plumbing to your shed can greatly enhance its functionality and value? Whether you want running water for handwashing, gardening, or a workshop, installing plumbing in your shed is a relatively easy process. In this simple DIY guide, I will walk you through the step-by-step process of adding plumbing to your shed, ensuring that you have all the necessary information to successfully complete the project on your own.
Key Takeaways:
- Adding plumbing to your shed can significantly improve its functionality and value.
- Before starting the project, check your local council’s guidelines regarding plumbing in outdoor structures.
- Insulating your shed is crucial, especially in cold regions to protect the pipes from freezing.
- Proper trenching is essential for installing the supply lines correctly and avoiding damage to other utilities.
- Choose the right plumbing materials and have the necessary tools for the installation process.
Zoning and Planning for Shed Plumbing
Before embarking on your shed plumbing project, it is crucial to familiarize yourself with the zoning laws and plumbing regulations in your area. These guidelines ensure that your plumbing installation meets the necessary requirements and maintains compliance with local building codes.
In order to avoid any legal and logistical issues, I highly recommend checking your local council’s guidelines regarding plumbing in outdoor structures. These regulations may cover various aspects of your shed plumbing project, including the required plumbing materials, installation techniques, and the depth at which you need to bury the supply line.
When it comes to zoning laws, they typically govern the purpose and use of the shed, as well as its proximity to other structures and property lines. These laws ensure that your shed meets specific criteria to comply with residential or commercial zoning regulations.
To illustrate the importance of zoning and planning for shed plumbing, let’s take a look at an example scenario:
Let’s say you plan to use your shed as a workshop, equipped with a sink and a water supply for various tools and equipment. Without adhering to zoning laws and plumbing regulations, you could potentially face legal penalties or even have to dismantle your plumbing system.
Consulting with an experienced plumbing contractor is highly recommended, as they can guide you through the specific plumbing requirements for sheds in your area. They have the expertise to ensure that your shed plumbing installation meets all necessary regulations and complies with zoning laws.
A plumbing contractor will be well-versed in the zoning and planning considerations relevant to your particular location. By partnering with a professional, you can save yourself the hassle of dealing with any compliance issues and rest assured that your shed plumbing is up to code.
Summary of Zoning and Planning Considerations for Shed Plumbing:
- Check your local council’s guidelines for plumbing regulations in outdoor structures
- Consider specific building codes, such as the depth requirement for burying the supply line
- Be aware of zoning laws and compliance issues related to shed use and proximity to other structures
- Consult with an experienced plumbing contractor to ensure compliance with regulations and zoning laws
| Consideration | Importance |
|---|---|
| Guidelines from local council | Essential |
| Building codes and regulations | Crucial |
| Zoning laws | Critical |
| Consulting with a plumbing contractor | Highly recommended |
Insulation for Shed Plumbing
Insulating your shed is crucial, especially if you live in a cold region where temperatures can drop below freezing. Proper insulation not only protects your shed from extreme weather conditions but also safeguards your plumbing system from freezing and potential damage.
When it comes to shedding insulation, there are two main areas to consider:
- Burying the pipes: Ensuring that the supply lines buried underground are below the frost line is essential. This prevents the pipes from freezing and bursting during colder months. Refer to local codes or consult with a professional plumber to determine the appropriate depth for burying the supply lines.
- Insulating exposed pipes: Although burying the pipes is a crucial step, it’s also important to insulate the exposed pipes within the shed. This helps in maintaining a consistent temperature and prevents freezing. One effective solution is to use pipe insulation foam, which provides a protective layer for the pipes. It acts as a barrier against the cold and helps keep the water flowing smoothly even in the harshest conditions.
To further protect your shed plumbing system, consider installing a shutoff valve at the point where the supply line exits the main house. This allows you to shut off the shed supply line and drain it during cold winter nights when the shed is not in use. Taking this precautionary measure can prevent any potential issues caused by freezing pipes.
Remember, insulating your shed plumbing is crucial for ensuring its longevity and functionality. By taking the necessary steps to protect your pipes from freezing, you can enjoy a reliable water supply in your shed throughout the year.
img {
display: block;
margin: 0 auto;
max-width: 100%;
height: auto;
}
Digging Trenches for Shed Plumbing
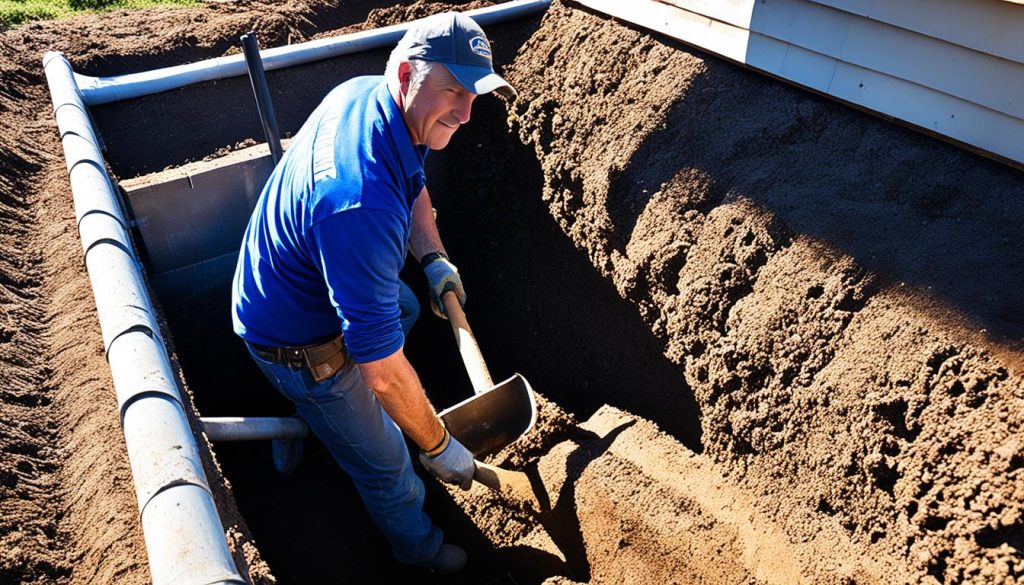
When it comes to adding plumbing to your shed, one important step is digging trenches for the supply lines. The extent of digging will depend on the type of plumbing line you’re installing, whether it’s for water or drainage. In this section, I’ll guide you through the process of trenching and digging, ensuring that you have all the information you need for a successful installation.
Choosing the Right Trenching Method
To make the digging process easier and more efficient, consider renting a trencher or ditch digger. These specialized tools can save you time and effort, especially if you have a large area to dig or if the soil is particularly hard or rocky. Trenchers are available in different sizes, so be sure to choose one that suits the dimensions of your shed and the depth required for the supply lines.
Inspecting the Area
Before you start digging, it’s essential to have the area inspected for any buried electrical conduits and pipes. This step is crucial to avoid potential accidents and damage to existing utilities. Contact your local utility company or hire a professional locator service to identify the exact location of underground utilities. Once you have this information, you can plan the trenching route accordingly, ensuring that the supply lines are installed safely.
Following Proper Digging Procedures
When digging the trenches, it’s important to follow proper procedures to ensure the supply lines are installed correctly and minimize the risk of damaging other utilities. Here are some key steps to keep in mind:
- Mark the trench route: Use stakes and string to mark the path of the trench, ensuring that it follows the planned route and is straight.
- Start digging: Use the trencher or ditch digger to excavate the trenches according to the desired depth and width for the supply lines.
- Remove debris: Clear any rocks, roots, or other debris from the trenches to ensure smooth installation of the supply lines.
- Protect the trenches: While the trenching process is underway, take precautions to prevent accidents, such as barricading the area and covering the trenches at the end of each day’s work.
By following these steps, you can ensure that the trenching process goes smoothly and that the supply lines are buried securely, ready for the next stage of the plumbing installation.
| Trenching Method | Pros | Cons |
|---|---|---|
| Trencher | – Saves time and effort – Provides precise depth control – Suitable for large areas |
– Cost of renting or purchasing – May not be suitable for rocky or hard soil |
| Ditch Digger | – Ideal for rocky or hard soil – Can handle smaller areas – Versatile |
– More labor-intensive – May require more time to complete the digging – Requires strong physical exertion |
Plumbing Materials and Tools for Shed Plumbing
When it comes to adding plumbing to your shed, choosing the right materials and tools is essential for a successful installation. Two popular options for plumbing materials in sheds are chlorinated polyvinylchloride (CPVC) piping and polyethylene (PEX) piping. Let’s take a closer look at each option:
1. Chlorinated polyvinylchloride (CPVC) piping:
- Rigid and inexpensive
- Slightly higher potential for leaks
2. Polyethylene (PEX) piping:
- Flexible and durable
- Lasts up to 100 years
Based on your preferences and budget, you can choose the most suitable option for your shed. Now, let’s discuss the tools you’ll need for shed plumbing:
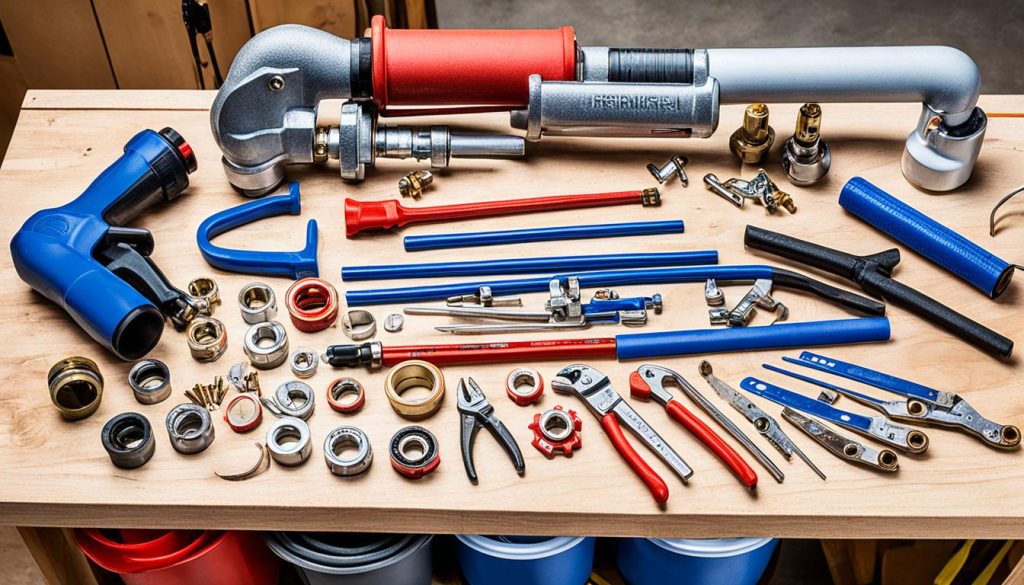
1. Pipe cutters: Essential for cutting pipes to the desired length.
2. Wrenches: Used for tightening and loosening fittings.
3. Soldering equipment: If you’re using CPVC piping, soldering equipment will be necessary for joining the pipes.
4. Crimping tools: If you’ve opted for PEX piping, crimping tools are required for securely connecting the pipes.
Having these materials and tools on hand will ensure a smooth and successful installation process. If you’re unsure about the specific tools or materials needed for your shed plumbing project, consult with a plumbing professional for expert advice and guidance.
Cost of Adding Plumbing to a Shed
When considering the cost of adding plumbing to your shed, it’s essential to take into account several factors that can influence the overall expense. These factors include the distance between your main house and the shed, the size of the shed, the number of fixtures you plan to connect, and the type of materials you choose for the plumbing installation.
According to data from Angi, the average cost of adding plumbing to a shed ranges from $900 to $1,300. This estimate includes the cost of materials, labor, excavation, connecting water lines, electrical work, and permits. Keep in mind that this is just an average, and your actual cost may vary depending on your specific circumstances.
It’s crucial to set a budget before starting the project and consider these factors to avoid any surprises or financial strain. While hiring professional plumbers may increase the overall cost, it can ensure a high-quality and efficient installation, giving you peace of mind and potentially saving you money in the long run.
Source Links
- https://www.workshopshed.com/2020/04/installing-plumbing-to-a-shed/
- https://www.angi.com/articles/how-much-does-it-cost-run-new-plumbing-toilet-shower-and-sink-bldg-70-away-house-plumbing.htm
- https://anewhouse.com.au/2022/02/how-to-add-plumbing-to-a-shed-essential-guide-4-useful-tips/
- Investing Wisely: How Windows & Doors in Boost Property Value and Financial Health - April 24, 2025
- The Financial Impact of Personal Injuries: Why Legal Help Matters for Business Owners - April 16, 2025
- The Hidden Financial Costs of Domestic Assault: What Business Owners Need to Know - April 16, 2025


