Plumbing Installation in a Shed: Your Quick Guide
Did you know that adding plumbing to a shed can significantly increase its functionality and value? Whether you want running water for handwashing, gardening, or a craft workshop, installing plumbing in a shed is a relatively straightforward process with the right guidance. In this guide, I will provide you with tips and insights on how to successfully put plumbing in a shed, including important considerations and step-by-step instructions.
Key Takeaways:
- Installing plumbing in a shed can greatly enhance its versatility and functionality.
- Before starting the project, check local zoning laws and regulations related to shed plumbing.
- Proper insulation is crucial for protecting shed plumbing from freezing temperatures.
- Consider renting a trencher or ditch digger to simplify the digging process.
- Collecting rainwater or treating greywater can provide eco-friendly water supply options for your shed.
Understanding Zoning Laws for Shed Plumbing
Before proceeding with any plumbing installation in your shed, it is essential to check local zoning laws and regulations. Adding plumbing to a shed typically requires compliance with building codes and guidelines to ensure the safety and functionality of the space.
Familiarize yourself with the requirements regarding the depth at which supply lines should be buried and the type of pipes suitable for optimal water pressure. This ensures that your shed plumbing system meets the necessary standards and functions efficiently.
If you encounter any compliance issues or are unsure about the regulations, consider consulting an experienced plumbing professional for assistance. They can provide expert advice on navigating zoning laws and help you avoid any potential complications.
Zoning Laws for Shed Plumbing: Key Considerations
- Check local building codes and regulations specific to the placement and installation of plumbing in sheds.
- Understand the minimum depth at which supply lines should be buried to prevent freezing and ensure proper water flow.
- Research the approved pipe materials and sizes suitable for shed plumbing to ensure safe and effective water supply.
- Consider any additional permits or inspections required by local authorities for shed plumbing installation.
By adhering to zoning laws for shed plumbing, you can ensure that your installation is compliant, safe, and efficient. It also helps you avoid any potential legal or structural issues in the future.
| Zoning Law | Requirement |
|---|---|
| Depth of supply lines | At least 18 inches below the frost line |
| Pipe material for water supply | PVC or copper |
| Pipe size | 1/2 inch or larger |
| Permits/Inspections | Building permit required |
Insulating Your Shed Plumbing
As we discussed in Section 2, adding plumbing to your shed is an excellent way to enhance its functionality. However, if you live in colder climates where temperatures can drop below freezing, proper insulation is crucial to protect your shed’s plumbing from freezing and bursting.
Insulating your shed plumbing involves two main aspects: burying the pipes at the correct depth to safeguard them from external cold and insulating the exposed supply pipes within the shed. By taking these steps, you can ensure uninterrupted water flow and avoid costly repairs due to frozen and damaged pipes.
Here are some essential tips for insulating your shed plumbing:
- Use thick pipe insulation foam or tape to cover any exposed pipes within the shed. This insulation helps retain heat and prevents the pipes from being affected by the cold temperatures inside the shed.
- Consider installing a shutoff valve near the entry point of your shed’s water supply line. This valve can be used to drain the water from the pipes during extremely cold weather, reducing the risk of freezing and bursting.
- Ensure all gaps and openings around the pipes are properly sealed to prevent cold air from entering the insulated areas. Use caulk or weatherstripping to seal any cracks or openings.
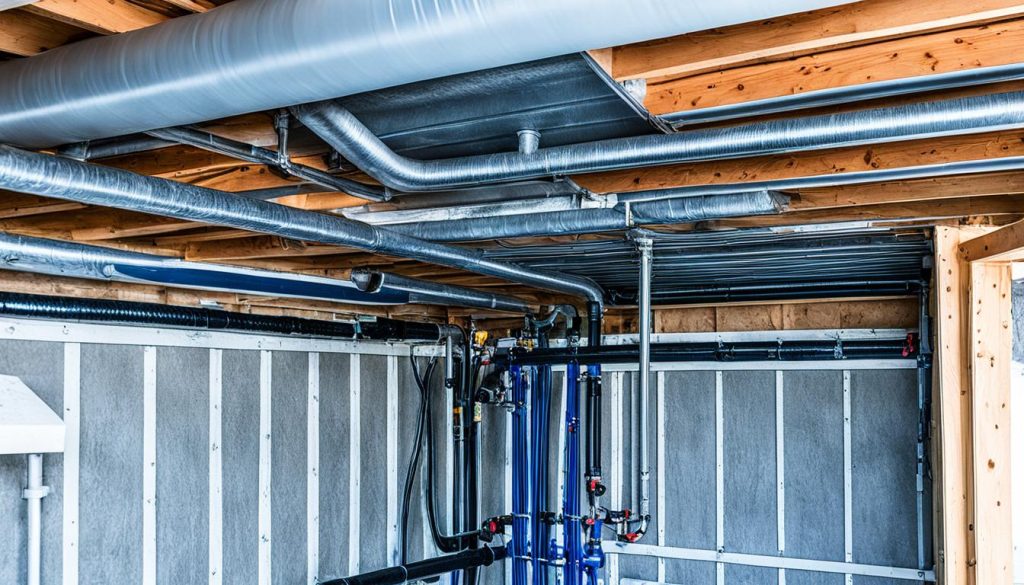
To visualize the insulation process, here’s an image of a properly insulated shed plumbing:
By following these insulation techniques, you can effectively protect your shed’s plumbing system from freezing temperatures and enjoy a functional and reliable water supply all year round.
Digging for Shed Plumbing
Installing plumbing in a shed often requires excavation to run supply lines from the main house to the shed. The extent of digging varies based on the specific plumbing requirements, such as water lines or sewer lines. This step is crucial to establish the connection and ensure a smooth flow of water to your shed.
To simplify the digging process and save time, consider renting a trencher or ditch digger. These tools are user-friendly and can significantly reduce the effort required for excavation. With their help, you can efficiently create the trenches needed for the plumbing installation.
However, before you start digging, it is essential to have the area inspected by a local inspector. They will check for any buried electrical conduits or pipes that may interfere with the digging process. It’s crucial to ensure the safety of your project and avoid damaging any existing infrastructure.
Pros and Cons of Different Excavation Tools
| Excavation Tool | Pros | Cons |
|---|---|---|
| Trencher | Efficient and quick | Limited width of trench |
| Ditch Digger | Flexible width options | Requires more physical effort |
Choose the excavation tool that best suits your needs and budget. The trencher is ideal for narrower trenches, while a ditch digger provides more flexibility in terms of trench width.
Remember, proper digging is crucial for the success of your shed plumbing project. Take the time to plan and execute the excavation carefully to ensure seamless plumbing connections and a hassle-free water supply in your shed.
Eco-Friendly Options for Shed Water Supply
If you are looking for eco-friendly alternatives to mains water for your garden shed, there are several options to consider. By implementing sustainable water solutions, you can reduce your environmental impact and conserve water resources. Let’s explore some eco-friendly options:
1. Rainwater Collection
Collecting rainwater from your shed’s roof is an excellent way to harness nature’s abundance. Set up a rainwater collection system by installing gutters and downspouts to direct rainwater into a storage tank. Ensure the tank is properly sealed to prevent contamination. While untreated rainwater is not suitable for drinking, it can be used for various purposes within your shed:
- Watering plants: Utilize rainwater to nourish your garden and potted plants. Rainwater contains natural nutrients that can enhance plant growth.
- Cleaning: Use rainwater to clean gardening tools, shed windows, and other surfaces. It can be just as effective as mains water for routine cleaning tasks.
- Cooling solar panels: If you have solar panels installed on your shed’s roof, rainwater can be used to cool them, improving their energy efficiency.
2. Greywater Recycling
Greywater refers to used water from sources such as sinks, showers, and washing machines. Recycling greywater can be a sustainable solution for irrigating your garden and landscape. Implement a greywater system that collects, filters, and treats the water, making it suitable for plant irrigation. This approach not only reduces the demand for mains water but also repurposes and conserves a valuable resource.
3. Composting Toilet
If you require a toilet in your garden shed, consider installing a composting toilet instead of a traditional flushing toilet. Composting toilets break down human waste through natural decomposition processes, converting it into compost that can enrich your garden soil. By using a composting toilet, you eliminate the need for water-intensive sewage systems, contributing to water conservation efforts.
By embracing eco-friendly alternatives for your shed’s water supply, you can reduce your reliance on mains water and contribute to a more sustainable future. Implementing rainwater collection, greywater recycling, and composting toilets can play a significant role in conserving water resources and minimizing your ecological footprint.
| Eco-Friendly Options for Shed Water Supply | Benefits |
|---|---|
| Rainwater Collection | – Provides a natural and abundant source of water – Nourishes plants with natural nutrients – Reduces reliance on mains water |
| Greywater Recycling | – Repurposes used water for irrigation – Conserves water resources – Reduces demand for mains water |
| Composting Toilet | – Eliminates the need for water-intensive sewage systems – Converts waste into compost for soil enrichment – Promotes sustainable waste management |
When to Hire a Professional for Shed Plumbing
While installing plumbing in a shed can be a manageable DIY project, there are instances where hiring a professional plumber or contractor is advisable. If you encounter challenges with meeting zoning requirements, lack the necessary technical expertise, or want to ensure the job is done correctly, seeking professional assistance is a wise choice. Professionals can offer guidance, expertise, and ensure compliance with regulations, saving you time and potential complications.
Instances When You Should Consider Hiring a Professional
- If you are unsure about navigating zoning laws and regulations for shed plumbing installation.
- If you lack the necessary technical expertise and experience to tackle the project.
- If you want to ensure that the plumbing installation is done correctly and without any errors.
- If you prefer to have professional guidance and recommendations throughout the process.
- If you want to save time and avoid potential complications that could arise from DIY attempts.
Hiring a professional for shed plumbing installation can provide you with peace of mind, knowing that the job will be done right. They have the knowledge and experience to navigate any challenges that may arise, ensuring that your shed plumbing is functional, safe, and compliant with regulations.
Remember, hiring a professional doesn’t mean you have to relinquish control entirely. You can still be involved in the decision-making process and work closely with the plumber or contractor to ensure that your specific needs and preferences are met.
If you decide to hire a professional, it’s essential to choose someone who specializes in shed plumbing installation. Request referrals, check their credentials and licensing, and compare quotes from different professionals to find the right fit for your project.
| Pros | Cons |
|---|---|
| Expertise and technical knowledge | Costs involved |
| Compliance with zoning laws and regulations | Relinquishing some control over the project |
| Saves time and potential complications | Dependency on the availability of professionals |
| Peace of mind knowing the job is done right |
Putting It All Together: Plumbing in a Shed Made Easy
Plumbing installation in a shed can unlock a world of possibilities, transforming it into a versatile and functional space. From adding a sink for easy handwashing to creating a dedicated workshop or garden sink, installing plumbing in your shed is a relatively straightforward process that can greatly enhance its value. By following a few essential steps and considering key factors, you can successfully bring water into your shed to meet your specific needs.
One of the first things to keep in mind when tackling shed plumbing is understanding local zoning laws and regulations. It’s important to ensure your project complies with building codes and guidelines set by your municipality. Familiarize yourself with requirements such as the proper burial depth for supply lines and the types of pipes suitable for optimal water pressure. If you encounter any difficulties, reaching out to a professional plumber or contractor can provide valuable assistance and ensure compliance.
Proper insulation is another crucial aspect of shed plumbing to prevent freezing and bursting pipes, especially in colder climates. While burying the pipes at the correct depth helps protect them from external cold, it’s equally important to insulate the exposed supply pipes within the shed. Using thick pipe insulation foam or tape and installing a shutoff valve to drain the supply line during extreme cold weather can safeguard your plumbing system. A well-insulated shed ensures uninterrupted water flow and allows you to comfortably use the space year-round.
When it comes to the actual installation process, careful planning is key. Digging for supply lines to connect the shed to the main water source might be necessary. Renting a trencher or ditch digger can simplify the excavation process and save you time. However, before you start digging, it’s always important to have the area inspected for any buried electrical conduits or pipes to avoid accidents or damage to existing infrastructure.
While many shed plumbing installations can be successfully completed as DIY projects, there may be instances where professional assistance is beneficial. If you’re unsure about any aspect of the project, lack the technical expertise, or want to ensure compliance with regulations, hiring a professional plumber or contractor can offer peace of mind. They can provide guidance, expertise, and ensure the job is done correctly, saving you time and potential complications.
Source Links
- https://www.workshopshed.com/2020/04/installing-plumbing-to-a-shed/
- https://gardenshedsdirect.net.au/3-incredibly-helpful-tips-plumbing-work-shed/
- https://www.actionsheds.com.au/factors-to-consider-in-shed-plumbing/
- Investing Wisely: How Windows & Doors in Boost Property Value and Financial Health - April 24, 2025
- The Financial Impact of Personal Injuries: Why Legal Help Matters for Business Owners - April 16, 2025
- The Hidden Financial Costs of Domestic Assault: What Business Owners Need to Know - April 16, 2025


