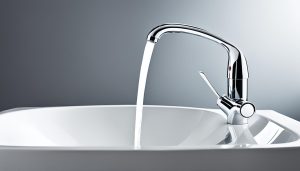
Solving Plumbing Issues: Quick DIY Fixes
Did you know that the average Canadian household experiences more than 20 plumbing issues every year? From leaky faucets to clogged drains, these problems can be frustrating and costly to fix. But here’s the good news: many plumbing issues can be solved easily with some basic tools and DIY skills.
By taking matters into your own hands, you can save money and avoid the hassle of waiting for a plumber. So whether you’re dealing with a leaking faucet, a running toilet, or a clogged drain, this article will provide you with step-by-step solutions to the most common plumbing problems. Get ready to become a DIY plumbing expert!
Key Takeaways:
- Save money by tackling common plumbing issues yourself.
- Learn how to repair a kitchen faucet, stop leaks in joints, find and stop sneaky leaks, fix a running toilet, unclog a bathtub drain without chemicals, fix a leaking water heater, and more.
- Prevent further damage and expensive repairs by addressing plumbing problems early.
- With basic tools and skills, you can become a DIY plumbing expert.
- Get ready to take control of your plumbing and save time and money.
Repairing a Kitchen Faucet
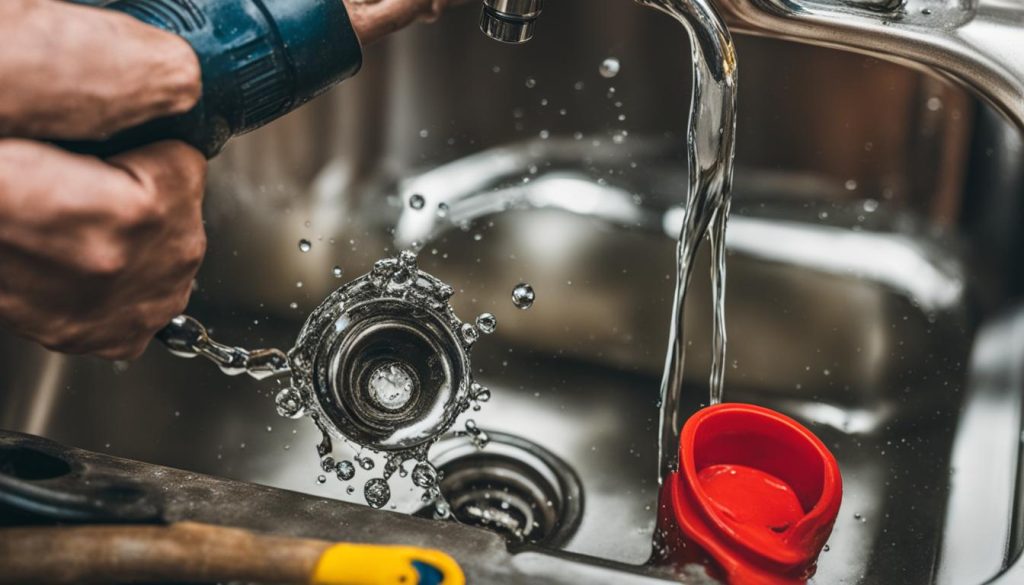
Is your kitchen faucet constantly dripping and driving you crazy? Don’t worry, fixing a dripping faucet is easier than you think. With just a few simple steps, you can put an end to that annoying drip and save money on your water bill. Plus, you’ll feel a sense of accomplishment knowing that you’ve tackled a DIY plumbing repair.
Before we jump into the repair process, it’s important to gather the necessary tools and materials:
- Adjustable wrench
- Screwdriver
- Replacement parts (such as O-rings or cartridges, depending on the type of faucet)
Once you have everything ready, follow these step-by-step instructions to fix your kitchen faucet:
- Turn off the water supply. Look for the shut-off valves under the sink and close them to prevent water flow.
- Remove the handle. Depending on your faucet, you may need to use a screwdriver or an Allen wrench to loosen the screw holding the handle in place.
- Take off the cartridge or valve stem. Different faucets have different mechanisms, so refer to the manufacturer’s instructions or consult their website for specific guidance.
- Inspect and replace any worn or damaged parts. If you notice any O-rings, washers, or cartridges that are cracked, broken, or worn out, replace them with new ones.
- Reassemble the faucet. Put everything back together in the reverse order, ensuring that all parts are properly aligned and tightened.
- Turn on the water supply. Slowly open the shut-off valves and check for any leaks or drips.
If you have followed these steps correctly, your kitchen faucet should now be functioning properly without any leaks. Enjoy the peace of mind knowing that you’ve successfully completed a DIY faucet repair!
| Benefits of DIY Kitchen Faucet Repair | Professional Kitchen Faucet Repair |
|---|---|
| Cost-effective | Expensive |
| Quick and convenient | Time-consuming |
| Empowering and rewarding | Dependent on external help |
| Opportunity to learn new skills | No personal growth |
Stop Leaks in Joints
As a homeowner, learning how to prevent plumbing leaks can save you both time and money. One of the key areas where leaks can occur is in the joints of water supply and waste line fittings. By properly connecting these fittings, you can ensure leakproof connections and avoid potential plumbing issues in the future.
Professionals use a few tricks to achieve leakproof joints, and with a little DIY knowledge, you can implement these techniques yourself.
Properly preparing the fittings
Before connecting pipes and fittings, it’s essential to ensure they are clean and free from any debris. Use a wire brush or sandpaper to remove dirt, rust, or old pipe sealant from the surfaces. This will create a smooth and secure connection, preventing leaks.
Applying the right sealant
To ensure a watertight joint, it’s crucial to choose the right sealant. Plumbers tape (also known as Teflon tape) is commonly used to seal pipe threads, preventing leaks from occurring at these connections. Apply the tape tightly in a clockwise direction, ensuring it covers the entire thread.
Using pipe compound for compression fittings
If you are working with compression fittings, pipe compound or joint compound can be used in addition to the compression ring to create a tight seal. Apply a thin layer of the compound to the compression ring and ensure it is evenly distributed.
Tightening fittings properly
Over-tightening or under-tightening fittings can lead to leaks. Make sure to use the proper tools, such as a pipe wrench or adjustable pliers, to tighten the fittings securely. Avoid using excessive force, as this can damage the fittings and increase the risk of leaks.
By following these steps and taking the time to properly connect fittings, you can prevent leaks in joints and avoid costly damage. With a little DIY know-how, you can confidently handle pipe repairs and ensure your plumbing system remains leak-free.
Finding and Stopping Sneaky Leaks
Water leaks can cause significant damage if left undetected and untreated. It’s essential to identify and fix these leaks early to prevent further problems and costly repairs. In this section, I will share some simple DIY methods for finding and stopping common water leaks around your home.
Where to Look for Leaks
When it comes to water leaks, prevention is key. By knowing where to look, you can catch leaks before they escalate into bigger issues. Here are some areas to inspect for common water leaks:
- Around bathtubs and showers
- Under sinks and in cabinets
- Around drains and pipes
- Near toilets and toilet tanks
Regularly checking these areas will allow you to identify any leaks early on.
DIY Leak Detection
Now that you know where to look, let’s talk about how to detect those sneaky leaks. Here are a few simple methods you can try:
- Visual Inspection: Look for signs of water stains, mold, or musty odors.
- Use a Water Meter: Check your water meter reading, then turn off all water sources in your home. If the meter reading continues to increase, you likely have a leak.
- Food Coloring Test: Drop a few drops of food coloring into your toilet tank. If you see the color appear in the bowl without flushing, there’s a leak in the flapper valve.
By using these DIY leak detection methods, you can identify the source of the leaks and take appropriate action.
Once you’ve located the leaks, it’s time to stop them in their tracks. The approach will depend on the type and severity of the leak. In some cases, you may be able to fix the issue yourself with simple repairs or adjustments. For more complex leaks, it’s best to consult a professional plumber.
Remember, addressing water leaks promptly can save you money and prevent further damage to your home. Don’t underestimate the importance of regular inspection and maintenance to keep your plumbing system in good condition.
Fixing a Running Toilet
Having a running toilet can be both annoying and wasteful. However, with a little know-how and a few simple steps, you can easily troubleshoot and fix the problem yourself. Follow this four-step strategy to solve 95 percent of toilet flush problems and ensure a smoothly running toilet.
Step 1: Identify the Issue
The first step in fixing a running toilet is to identify the underlying issue. There can be multiple reasons why a toilet won’t stop running, such as a faulty flapper valve, a worn-out fill valve, or a misaligned float. By understanding the root cause, you’ll be able to address the problem more effectively.
Step 2: Replace or Adjust the Flapper Valve
In many cases, a running toilet is caused by a faulty flapper valve. This rubber valve is responsible for sealing the flush valve opening and preventing water from constantly flowing into the bowl. If the flapper valve is worn out or not sealing properly, it needs to be replaced. Simply remove the old flapper valve and install a new one according to the manufacturer’s instructions. Alternatively, if the flapper valve seems to be in good condition, check if it needs to be adjusted to ensure a tight seal.
Step 3: Check and Adjust the Fill Valve
The fill valve is responsible for refilling the tank after each flush. If the fill valve isn’t working correctly, it can cause continuous water flow. Check if the float is properly adjusted to the correct water level and make any necessary adjustments. If the fill valve is worn out or damaged, it may need to be replaced. Refer to the manufacturer’s instructions for guidance on replacing the fill valve.
Step 4: Verify and Adjust the Float
The float is responsible for controlling the water level in the tank. If it’s not set correctly, it can cause a running toilet or a weak flush. Ensure that the float is positioned properly and adjust it if necessary. Most modern toilets have an adjustable float arm that can be bent or lowered to achieve the desired water level. By setting the float at the correct level, you can prevent water from overflowing into the overflow tube and eliminate a running toilet.
By following these four steps, you can troubleshoot and fix common toilet flush problems in no time. With a little practice, even a plumbing novice can successfully stop a running toilet and avoid the need for costly repairs or professional assistance.
| Common Toilet Flush Problems | Possible Causes | Solutions |
|---|---|---|
| Constantly running toilet | Faulty flapper valve | Replace or adjust the flapper valve |
| Weak flush | Inadequate water level | Adjust the float or fill valve to increase water level |
| Water not refilling after flush | Malfunctioning fill valve | Check and adjust the fill valve or replace if necessary |
Unclogging a Bathtub Drain Without Chemicals
If you’re dealing with a slow or clogged bathtub drain, there’s no need to reach for harsh chemicals. With a few simple steps, you can unclog your bathtub drain naturally and without causing any harm to the environment. By removing the stopper and clearing out hair and gunk, you’ll be able to restore proper drainage and keep your bathtub functioning smoothly.
To unclog a bathtub drain without chemicals, follow these easy steps:
Step 1: Remove the stopper
Begin by locating the stopper in your bathtub drain. The stopper can be either a lift-and-turn, toe-touch, or a trip-lever type. Carefully lift or unscrew the stopper to remove it from the drain.
Step 2: Clear out hair and debris
Using a pair of gloves or tweezers, reach into the drain and remove any visible hair or debris. Be thorough in removing as much gunk as possible to ensure optimal drainage.
Step 3: Use a drain snake
If the clog is stubborn and persists, try using a drain snake. Insert the drain snake into the drain and rotate it while pushing it further into the pipe. This will help loosen and remove any remaining blockage.
Step 4: Flush with hot water
Once you’ve cleared the clog, turn on the hot water and allow it to flow through the drain for a few minutes. The hot water will help flush out any remaining residue and ensure that your drain is completely clear.
By following these simple DIY methods, you can unclog your bathtub drain without the need for harmful chemicals. Remember to regularly clean your drain to prevent future clogs and maintain optimal drainage.
Fixing a Leaking Water Heater
If you’ve noticed a leaking water heater in your home, don’t panic. You can easily fix common leaks caused by temperature and pressure relief valves or drain valves with simple DIY repairs. By following these steps, you can save money on costly replacements and extend the life of your water heater.
First, check the temperature settings on your water heater. If the temperature is too high, it can cause excessive pressure and lead to leaks. Adjust the temperature to a safe and efficient level to prevent future issues.
Next, mineral deposits can accumulate in your water heater over time, causing leaks. To remove these deposits, turn off the power to the water heater and drain the tank. Use a hose and a brush to clean the valves and remove any built-up sediment. This maintenance step can help prevent leaks and ensure the optimal performance of your water heater.
Finally, inspect the temperature and pressure relief valve and the drain valve. These valves are common sources of leaks. If you notice any leaks or loose connections, use a wrench to tighten them. If the valve is faulty, it may need to be replaced to stop the leak completely.
- Investing Wisely: How Windows & Doors in Boost Property Value and Financial Health - April 24, 2025
- The Financial Impact of Personal Injuries: Why Legal Help Matters for Business Owners - April 16, 2025
- The Hidden Financial Costs of Domestic Assault: What Business Owners Need to Know - April 16, 2025
